How to permanently delete files
Published on May 13,2017
“Delete does not mean delete!” And if the aforementioned statement leaves you in a self-quagmire, upon reading this article, you will unanimously join me in hallowing the quoted statement. When you routinely delete a file (by right-clicking on it and choosing delete) on your PC, it is sent to the recycle bin, and even if you empty or delete what’s in the recycle bin (by right clicking on the recycle bin and choosing ‘empty’), the files still remain on your hard drive and can be retrieved by recovery utilities. Just to show I care, this should at least inflate some goose bumps on that plush skin of yours, especially if you are in one of these scenarios:
- If you decide to dispose of your old equipment. Whether you have your device recycled, give it to a friend, or donate it to a charity, or a school, you need to protect the information on it from exposure.
- Better still, if you are a lawyer or just a doctor dealing with patients, the Oregon Rule of Professional Conduct 1.6(c) requires lawyers to take reasonable steps to prevent the inadvertent disclosure of or unauthorised access to client information. So what will you do to comply with such laws, Mr Lawyer? To comply with this rule, you need to make sure client data stored on your computer and other media aren’t compromised when you get rid of the devices. This requires you to ensure that data stored on these devices cannot be reconstituted after they leave your control.
- And for the other world, if you are a ‘tough’ digital criminal or just a hacker the way you claim to be, then it will be your last desire to leave digital footprints in your hard drives, especially when you are in Oliver Queen’s hot list. Your Disposing of office equipment or devices without first permanently deleting data is an unethical and a malpractice risk.
With all that I can confidently say that you are the right candidate of this article. If so then do not forget to leave a comment below.
The Tech behind “delete does not mean delete.”
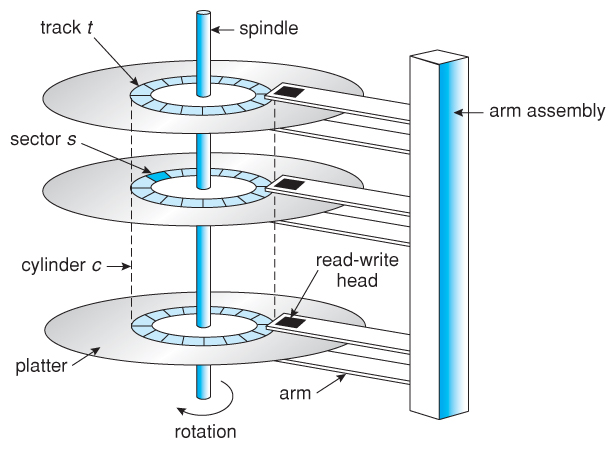
When a file is created, a directory entry for that file is also created. Windows (and other operating systems) keep track of where files are on a hard drive through “pointers.” Pointers are just likened to any other pointer in an archer’s arrow; it always points at the target. In a nutshell, each file and folder on your hard disk have a pointer that tells the operating system (OS) where the file’s data begins and ends (inside the hard disk). Consider sector s (from image two) which can be part of the data track t (from image one). The pointer is actually a link to the actual data.
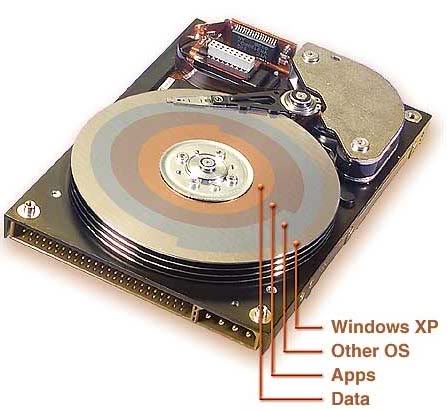
When you delete a file, the OS removes the pointer only. It removes the link it would have used to access the data when you request it (for web developers, if you remove the link to a document in a web page, you can no longer access the document; yet it is still available on the server. Or when you hide a file or a folder, you have just hidden the link but the data is still available). It then marks the sectors containing the file’s data as available i.e. free space for a new data to be written onto it. From the file system’s (i.e. your famous file manager) point of view, the file is no longer present on your hard drive and the sectors containing its data are considered free space. Consider still, when a file is deleted and not sent to the recycle bin, the first letter of the filename in the directory entry is changed to a special character (Hexadecimal E5). All entries for that file in the File Allocation Table are then cleared. The data contained in the file remains on the hard drive until it is overwritten. Theoretically, this data could remain on the hard drive forever.
The data is still present on the hard drive and just gets overwritten with time as new data is added. This is done to save time and performance so that you don’t have to wait for actual deletion, and most of the time, it’s great – as long as your drive remains in your possession. The worst case scenario is below.
When you run any application like a word processor, things aren’t run the way you think. The reason for this is that in order to function properly, operating systems and applications creates additional files or write data to the hard drive. The files include; windows swap and page files, temporary files, printer spool files, and metadata also called data about data. All of this is done without the user’s knowledge. From a privacy and corporate security standpoint, it is important to know about these additional files. These files may contain remnants of proprietary data, research and development projects, confidential memos, merger and acquisition information, financial data, customer information etc. Although these files may not be viewable or recoverable by the user, they can be recovered utilising computer forensics tools (or simply viewed using a tool such as Norton’s Disk Edit).
The act of permanent deletion
Until the operating system actually writes new data over the sectors containing the contents of the file that you ‘safely’ deleted, the file is still recoverable. Getting access to the deleted data is as simple as restoring the links. A file recovery program can scan a hard drive for these deleted files and restore them. If the file has been partially overwritten, the file recovery program can only recover part of the data. For sensitive data, you need to make sure that your computer overwrites both the links to the information and the information itself. Rumours also have it that government agencies (only the serious ones for that matter) have the capability to recover data that has been overwritten as many as 21 times. So how do you get rid of that data?
We employ data sanitization to do this donkey work. This involves using specialised software tools that permanently delete files from your computer by overwriting the information with random data (actually 0’s and 1’s. When these methods are used, overwritten data can never be un-deleted with a file recovery tool. Software programs that permanently delete selected files are called file shredder programs. While those that completely erase the entire hard drive, not just selected files, are called data destruction programs. Both programs use different data sanitization methods (such as Secure Erase, DoD 5220.22-M, Guttmann, Random Data) to overwrite data. Some software programs overwrite deleted data only once; others overwrite three, seven, or more times. The more overwrite passes a program makes, the longer the sanitization process will take.
File Shredder Programs
- zDelete download the program from the link and install it on your computer. A ZDelete Bin will appear on your desktop and replace the Windows Recycle Bin. You simply drag and drop files in the ZDelete Bin, and that document will be completely deleted. It has both free and paid versions. The paid version offers more features for $29.00 per license. User instructions are available for download as a portable document format (PDF).
- Eraser It’s available for free. Once the software is downloaded and installed on your computer, an Eraser icon will be automatically added to the Windows contextual menus. Just right-click on the file, select the “Eraser” option, and then click on “Erase.” You can also schedule an erasing task to wipe out data on a recurring basis. The default data sanitization method that Eraser uses is Gutmann- 35-passes, so it overwrites the deleted data 35 times. This means if you have many files to delete, it might take a while.
- Freeraser It is also available for free. Once downloaded and installed, a Freeraser trash bin icon will appear on the desktop. Drag and drop files into the folder to permanently delete them.
- Other free programs that you might consider are Securely File Shredder, File Shredder, Secure Eraser, WipeFile.
Data Destruction Programs
- DBAN (Darik’s Boot and Nuke) This free tool erases hard disk drives (HDDs) in PC laptops, desktops, or servers. Simply download the program from the above link to a CD or flash drive, then boot from it. Follow the instructions on DBAN’s menu interface. The paid version, Blancco Drive Eraser, complies with the Department of Defense data sanitization guidelines, provides a certificate of data removal, and offers more options, including data erasure for solid state drives (SSDs).
- HDDErase you can use HDDErase in two ways after you download the program to your computer. The first is to burn the .iso file to a CD and boot from it to erase your hard drive. The download folder includes a HDDErase ReadMe file that has instructions on how to create the boot disk. The second is to install the .exe file in Windows and use it to securely erase data from different devices, such as a USB drive, another internal hard drive, or an external hard drive.
- CBL Data Shredder you can burn CBL Data Shredder directly to a CD and boot from it to erase the hard drive. You can also install the program in Windows like a regular program and run it to delete other devices, such as flash drives or another internal hard drive.
- Other data destruction programs: KillDisk, MHDD, Format Command with Write Zero Option.
- Good news for the Mac users. The Macintosh has built-in secure data sanitization features that permanently delete selected files or wipe the entire hard drive. Secure Empty Trash, available in the Finder menu, deletes selected files and overwrites them with a single pass of zeroes. The hard drive can be wiped out using the “Secured Erase Options” in Disk Utility.
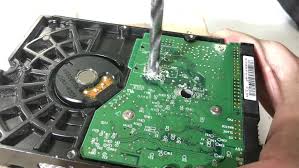
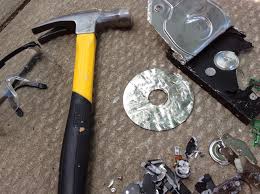
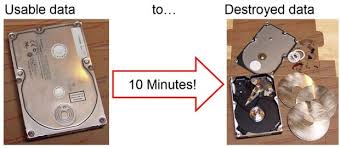
- Mr Robot’s style. You could also drill a few holes in the platter just to be safe. You can also permanently destroy your hard drive by brute force. You would need to open the computer to locate the hard drive, then locate and access the disk platter inside the hard drive. It is the platter (the device that stores most of the data on your computer) that you need to physically destroy. Take the drive outside and use a hammer to smash it to pieces. Once the drive is physically obliterated, you can take the parts to any place that recycles electronics, or just send them to me (I really need them).